
Stretching your budget doesn’t mean sacrificing style when it comes to upgrading outdoor spaces. Affordable paving solutions can give patios a polished look while ensuring durability and functionality for daily use. From concrete pavers to repurposed brick or gravel accents, there are countless ways to achieve a welcoming design without overspending. Homeowners seeking low-maintenance, long-lasting, and stylish layouts will find plenty of inspiration here. This guide highlights the best cheap patio paver ideas that balance cost-effectiveness, visual appeal, and practical outdoor living solutions.
Grid Pavers with Gravel Infill
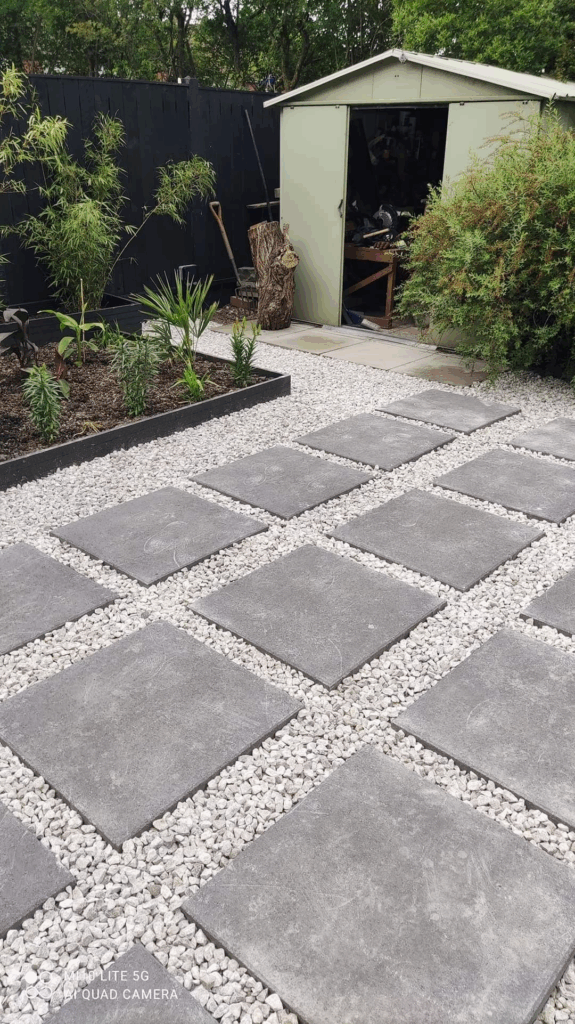
Designers often turn to grid pavers filled with gravel when seeking a budget-friendly option that balances durability and style. This method uses precast concrete grids or open-cell pavers placed over a compacted base, with gravel filling the gaps. The combination allows for excellent drainage while giving patios a clean, geometric finish that feels modern yet approachable. Unlike solid slab installations, this technique reduces costs by using less concrete and requiring fewer materials overall. Homeowners can choose pea gravel, crushed stone, or decorative aggregates to personalize the look and adjust texture underfoot. Installation is manageable for DIY projects since the grid structure provides built-in stability and simplifies leveling compared to irregular stonework. Beyond affordability, this setup is eco-conscious, as the permeable surface helps rainwater return to the ground, reducing runoff. Maintenance is minimal—occasional raking of displaced gravel keeps the surface fresh. Edging the patio with brick or timber boards can prevent migration of the gravel, ensuring long-term neatness. For families, the surface is sturdy enough for seating or planters, while its porous nature stays cooler than poured slabs in summer heat. As a result, grid pavers with gravel infill present an accessible, sustainable, and versatile patio foundation without straining the budget.
Flagstone Irregular Layouts for Flow
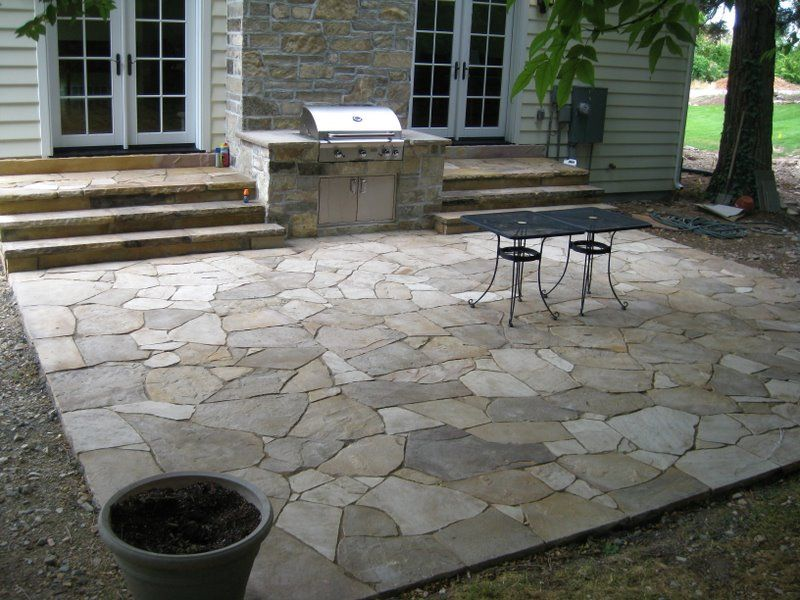
Organic curves and irregular stone placements create a patio that feels natural, relaxed, and inviting. Flagstone, especially when bought in bulk or as seconds, offers a cost-effective way to build a surface without the uniformity of manufactured pavers. Rather than cutting each piece to exact dimensions, homeowners can work with the stone’s inherent shapes, arranging them like a jigsaw puzzle for an easygoing look. This reduces waste and labor, since trimming is minimal. Sand or gravel fill between the gaps further lowers expenses compared to mortar-set applications. The resulting design blends seamlessly with garden pathways and outdoor landscapes, softening transitions between hardscape and greenery. Choosing locally sourced stone often cuts transportation costs and ensures the patio complements regional character. Despite the affordability, irregular flagstone retains a timeless charm that rivals more expensive installations. Spaces between slabs can also be planted with creeping thyme or moss for texture and seasonal interest. Maintenance is straightforward—sweeping debris and replenishing joint fill when needed. Because each patio is unique, no two layouts appear the same, making the design feel custom despite its budget-conscious approach. Flagstone irregular layouts deliver a flowing, earthy atmosphere perfect for backyards seeking character without overspending.
Checkerboard Brick & Stone Combo
Alternating squares of brick and stone create a checkerboard effect that feels playful yet structured. This design approach allows homeowners to use affordable materials in creative ways while maximizing impact. Bricks, often the least costly option, pair well with leftover or discount stone tiles sourced from quarries or clearance bins. Arranged in alternating blocks, the contrast highlights texture and color, offering visual rhythm across the patio surface. For tighter budgets, concrete pavers painted or stained to resemble stone can substitute, achieving the same look at a fraction of the cost. Installation remains straightforward—layout is defined by the checker pattern, requiring careful measurement but no advanced cutting techniques. Sand or compacted gravel beneath ensures stability and proper drainage, keeping costs down by avoiding mortar work. This patio style suits small courtyards where pattern makes the space feel dynamic without extensive landscaping. It can also extend into garden paths, linking outdoor zones with continuity. Beyond aesthetics, checkerboard layouts allow flexibility—if one section shifts, it’s easy to lift and reset. Low maintenance, high creativity, and undeniable character make this mix a budget-savvy way to give patios personality. The checkerboard brick-and-stone combo proves that clever design can outperform expensive uniform surfaces.
Grass or Moss Between Floating Paver Tiles
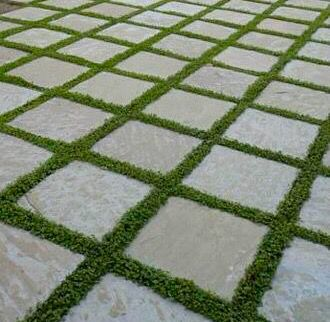
Designers frequently recommend leaving gaps between large paver tiles to introduce grass or moss for a soft, organic finish. This approach transforms rigid stone layouts into breathable surfaces that feel less formal and more integrated with surrounding greenery. Large-format tiles or affordable concrete slabs spaced apart reduce the total material needed, cutting costs significantly. Grass planted in the joints provides a cooling effect in summer and helps manage water runoff by soaking rain naturally. In shady or damp locations, moss thrives in the crevices, delivering a charming, timeworn character with minimal maintenance once established. The floating tile concept also simplifies installation—spacing eliminates the need for exact edge alignment, making DIY projects more forgiving. Homeowners can experiment with different gap widths depending on the plant they prefer, tailoring the look from modern minimal to rustic cottage. Maintenance involves mowing over grass or occasionally trimming moss edges to prevent overgrowth. The interplay between stone and green enhances texture, reduces surface heat, and adds natural resilience. Affordable, stylish, and eco-conscious, floating paver tiles with planted joints are an excellent choice for patios aiming to balance hardscape durability with lush garden appeal on a modest budget.
Pea Gravel with Stepping Pavers
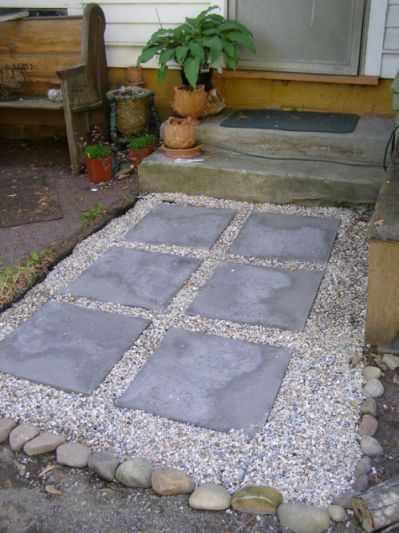
Budget-conscious homeowners often appreciate the simplicity of pea gravel paired with stepping pavers. This system minimizes material usage while still creating a structured surface for outdoor living. Pea gravel, one of the most affordable ground covers, fills large areas quickly, while stepping stones placed strategically offer stability for walking, dining, or seating. The combination eliminates the need for a fully paved patio, reducing both expense and installation labor. For DIYers, laying weed barrier fabric beneath the gravel prevents unwanted growth and helps keep the surface tidy. Stepping pavers can be purchased in a variety of shapes—square, round, or irregular—making it easy to match the surrounding landscape design. Because gravel shifts naturally, the surface remains permeable, reducing drainage issues and heat buildup. Edging with timber, stone, or metal strips keeps the gravel contained, preserving clean lines. Maintenance involves occasional raking to redistribute stones and re-level areas of heavy use. This style works especially well in cottage gardens, rustic backyards, or relaxed spaces where informality adds charm. Affordable, adaptable, and quick to install, pea gravel with stepping pavers provides a versatile patio solution that balances function and aesthetics without stretching the budget.
Large Pavers with Wide Spacing and Fill
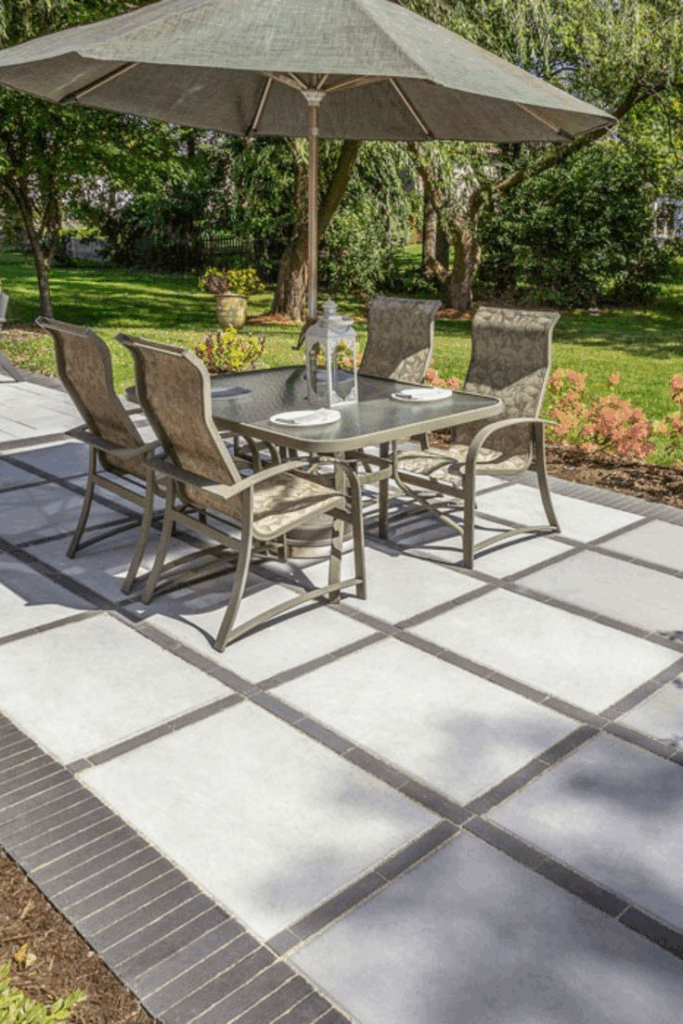
Spacing large pavers several inches apart reduces material costs while introducing creative opportunities for infill. Instead of covering the entire surface with stone, homeowners can arrange oversized concrete or sandstone pavers in a grid-like pattern, leaving gaps for gravel, river rock, or even low-growing ground cover plants. This approach not only stretches the budget but also produces a modern, airy look that feels less rigid than tightly fitted patios. The wide spacing allows better drainage and minimizes issues with settling since each slab functions independently. For those seeking a softer effect, creeping thyme or dwarf mondo grass can be planted between joints, blending greenery with hardscape. Installation is approachable for DIY projects—pavers are laid on a compacted base with attention to alignment, while filler material requires only raking or light planting. Maintenance varies depending on the infill: gravel may need periodic leveling, while plants require trimming. The visual result is a patio that balances structure and softness, offering texture variety and a contemporary edge. Large pavers with wide spacing deliver durability, aesthetic appeal, and affordability in one cohesive design, making them a go-to option for stylish yet budget-friendly outdoor living.
DIY Circular Paver Focal Platform
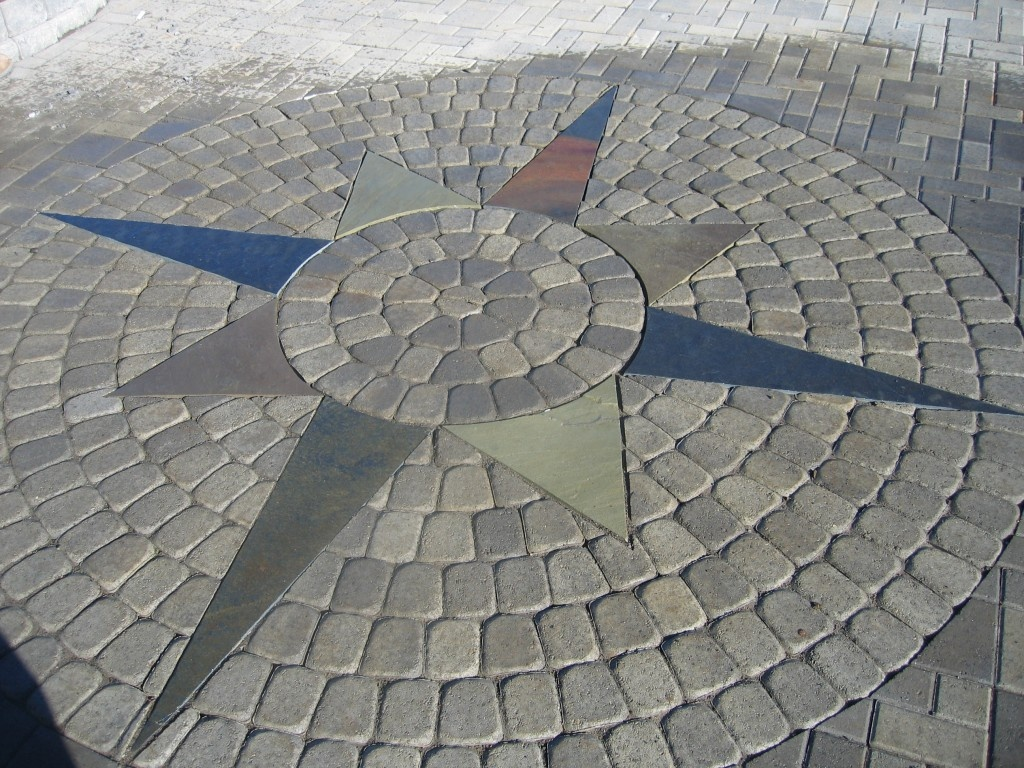
Circular layouts add a striking focal point to patios without demanding high costs. By arranging inexpensive concrete pavers, bricks, or reclaimed stone in a radiating pattern, homeowners can craft a dedicated platform ideal for seating, fire pits, or garden features. Unlike full patio builds, this approach focuses material in a single circular zone, keeping expenses lower while still offering significant impact. Pre-designed kits are available, but DIYers can replicate the effect using basic string-line measurements and affordable stepping stones. Sand or gravel as a base keeps installation simple and accessible without requiring mortar. The circular shape naturally encourages gathering and works well as a social hub in backyards. Borders of crushed gravel or planted edges soften the look while anchoring the design within the landscape. Because of its modular nature, sections can be expanded later, allowing flexibility as budgets or needs grow. Maintenance is minimal—occasional sweeping and weed control around joints keeps the surface tidy. Affordable yet highly functional, a circular paver focal platform proves that outdoor style doesn’t always require large-scale investment. It’s an ideal project for homeowners seeking a centerpiece that enhances usability while respecting budget limits.
Mixed-Shape Pavers Creating Subtle Repeat Pattern
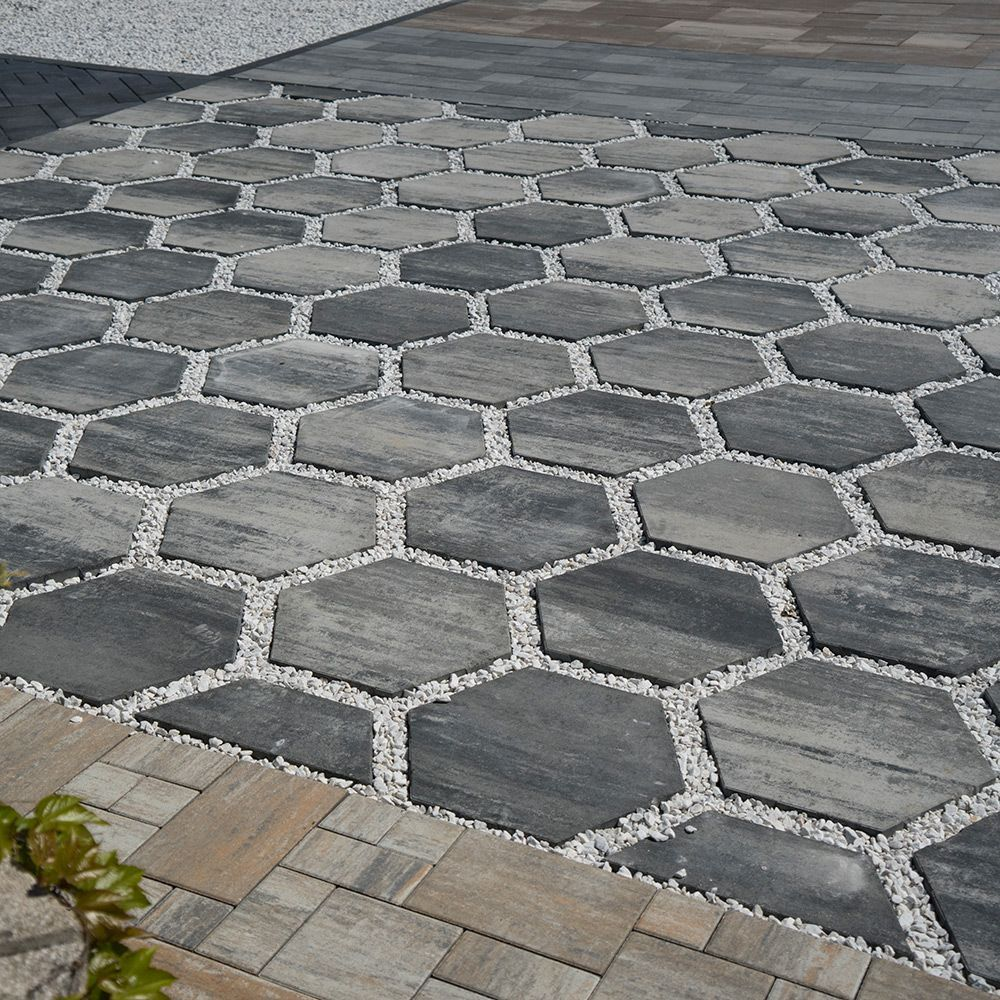
Variety in shape can deliver character without inflating costs, especially when mixing discounted or leftover pavers. Using square, rectangular, and irregular pieces in a repeating layout produces rhythm and visual interest, avoiding the monotony of uniform slabs. By sourcing clearance lots or reclaimed materials, homeowners can keep budgets low while crafting a patio that feels unique and customized. Patterns may be subtle—such as alternating rows of rectangles with scattered squares—or more elaborate when combined with gravel accents. This strategy works particularly well for mid-sized patios, where variation prevents the surface from appearing plain but doesn’t overwhelm the design. Installing mixed-shape pavers is manageable for DIY projects since gaps between irregular sections can be filled with sand or pea gravel, reducing the need for precise cutting. The resulting surface feels artisanal, as though crafted intentionally rather than mass-produced. Maintenance is simple: brushing sand into joints and occasional leveling ensures stability. This blend of shapes provides long-term flexibility, allowing homeowners to replace or adjust sections as needed without disrupting the entire layout. Mixed-shape paver patterns demonstrate how affordable design solutions can achieve a handcrafted feel while maintaining durability and cost-efficiency.
Fire Pit Ring with Crushed Gravel Surround

Backyard fire features gain charm and function when paired with a crushed gravel surround and simple paver ring. The central fire pit can be built using budget-friendly concrete retaining wall blocks or circular paver kits, while gravel extends outward to create a defined patio zone. This design keeps materials affordable by limiting pavers to the focal ring and using gravel for the majority of the surface. Gravel provides excellent fire safety benefits since it is non-flammable and drains water effectively, preventing pooling around the pit. The area becomes low-maintenance—sweeping debris and redistributing gravel as needed keeps it looking neat. Seating can be added with benches, Adirondack chairs, or simple DIY log stools, turning the space into an inviting gathering hub. For added definition, inexpensive metal or stone edging keeps the gravel contained. Homeowners can further personalize the setup by incorporating solar lanterns or planting beds at the perimeter. Because installation avoids mortar or concrete slabs, the project remains accessible for DIYers, often achievable in a weekend. A fire pit ring with gravel surround combines affordability, safety, and style, proving that even modest budgets can deliver functional, cozy outdoor destinations.
Budget Sandstone or Quarry Stone Clusters
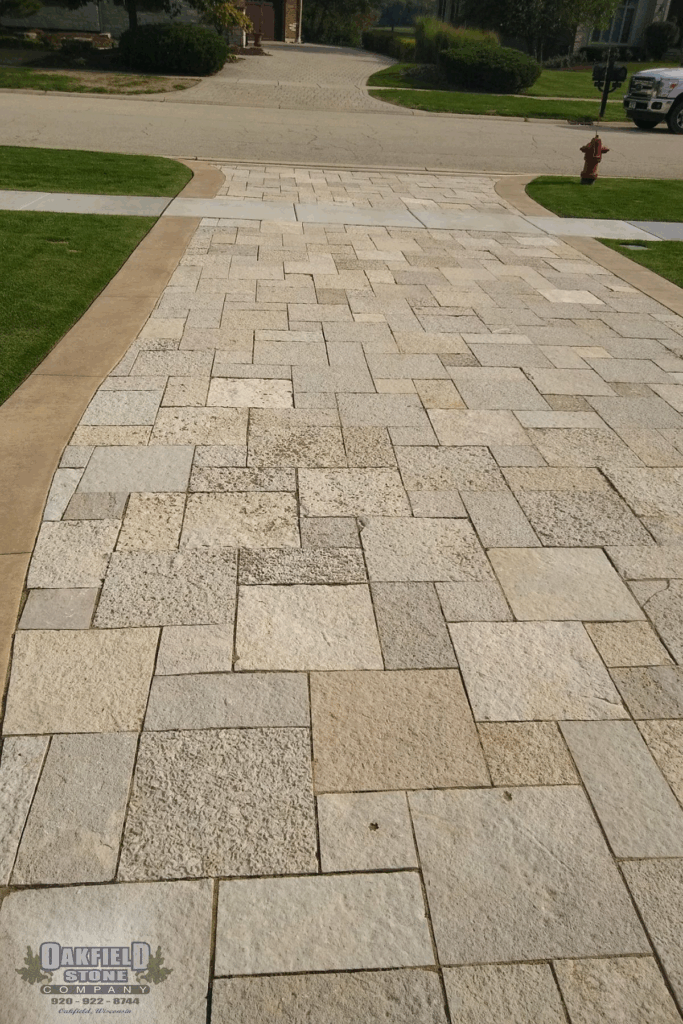
Clusters of sandstone or quarry stone offer an earthy, rustic surface that feels natural while remaining budget-friendly. Many suppliers sell offcuts, irregular shapes, or quarry seconds at reduced prices, making this an excellent option for cost-conscious homeowners. Instead of covering the entire patio with tightly fitted pieces, stones can be arranged in small groupings or clusters, leaving gravel, soil, or ground cover plants to fill surrounding spaces. This technique saves material costs and reduces labor since precision cutting is unnecessary. The resulting design looks organic, resembling pathways or patios that have aged into the landscape over time. Sandstone in particular offers warm, golden tones that blend well with garden settings, while quarry stone provides rugged texture and durability. Installation is straightforward: compact a gravel base, then set stones securely to avoid wobbling. Maintenance involves occasional resetting of shifted pieces and refreshing joint fill. Because each cluster arrangement is unique, no two patios appear identical, giving the impression of a custom design. Budget sandstone or quarry stone clusters provide timeless character, durability, and visual charm while respecting financial limits, making them a smart option for rustic or cottage-style backyards.
Textured Concrete Pavers via Molds
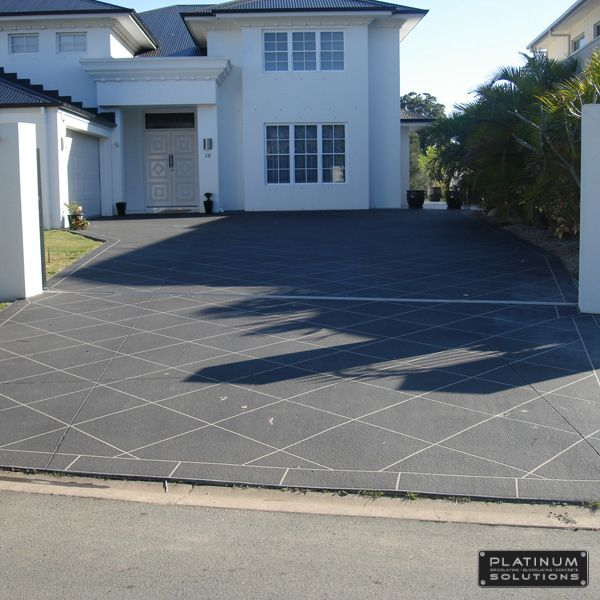
Homeowners interested in DIY approaches often turn to textured concrete pavers created with reusable molds. This method allows full control over shape, pattern, and finish at a fraction of the cost of purchasing pre-made stone. Using affordable concrete mix, molds can be filled and left to set, producing consistent pieces that mimic slate, brick, or cobblestone textures. Pigments or stains can be added for color variation, enhancing realism while maintaining affordability. Beyond cost savings, this approach ensures uniformity, simplifying installation compared to irregular stone. Patios constructed with molded pavers are durable and weather-resistant when properly sealed, offering longevity without high expense. Because molds can be reused indefinitely, homeowners can expand the patio later or replace broken pieces at minimal cost. Installation is simple: lay the cured pavers over a compacted gravel base with sand joints. Maintenance involves resealing every few years to protect against stains or fading. For creative homeowners, the ability to experiment with different mold styles or color blends adds a custom touch that looks professional despite its DIY origins. Textured concrete pavers via molds strike an excellent balance between affordability, creativity, and resilience.
Starter Patio with Flagstone Borders
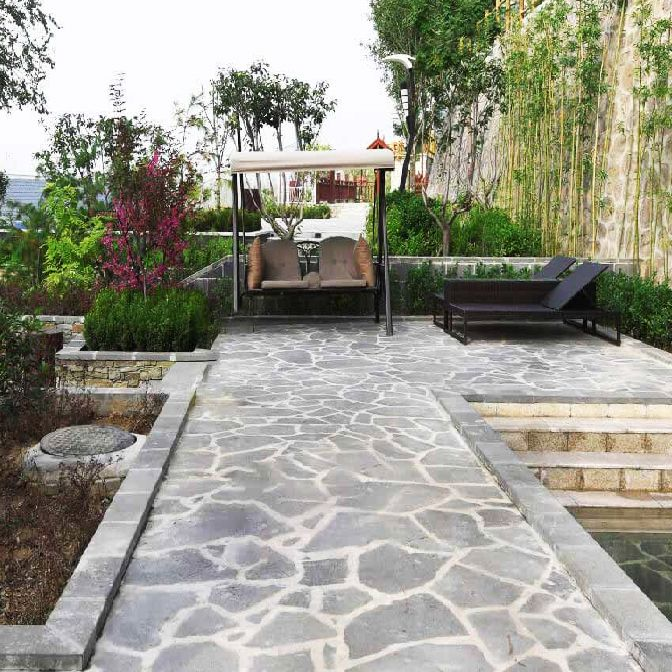
For those working within tight budgets, a starter patio framed with flagstone borders offers both structure and style. Instead of covering the entire surface with stone, homeowners can lay a central area of affordable gravel, decomposed granite, or concrete pavers, then outline the perimeter with irregular flagstone. This reduces costs significantly while maintaining a polished, finished appearance. The contrasting materials highlight the border, making the design appear intentional rather than incomplete. Installation is approachable: compact a gravel base, spread fill material for the center, and arrange flagstones along the edges. Mortar is optional—sand or gravel joints work well for informal styles. Maintenance is minimal; refreshing the gravel or re-leveling flagstones occasionally will keep the surface tidy. This setup also allows for gradual upgrades—over time, additional flagstones can be added inward if the budget allows. A border-framed patio works well in both small and medium-sized backyards, complementing garden beds or acting as a base for outdoor seating. Combining affordability with visual appeal, a starter patio with flagstone borders demonstrates how simple adjustments can create an attractive outdoor space without overspending.
Multi-Level Patio Using Standard Affordable Tiles
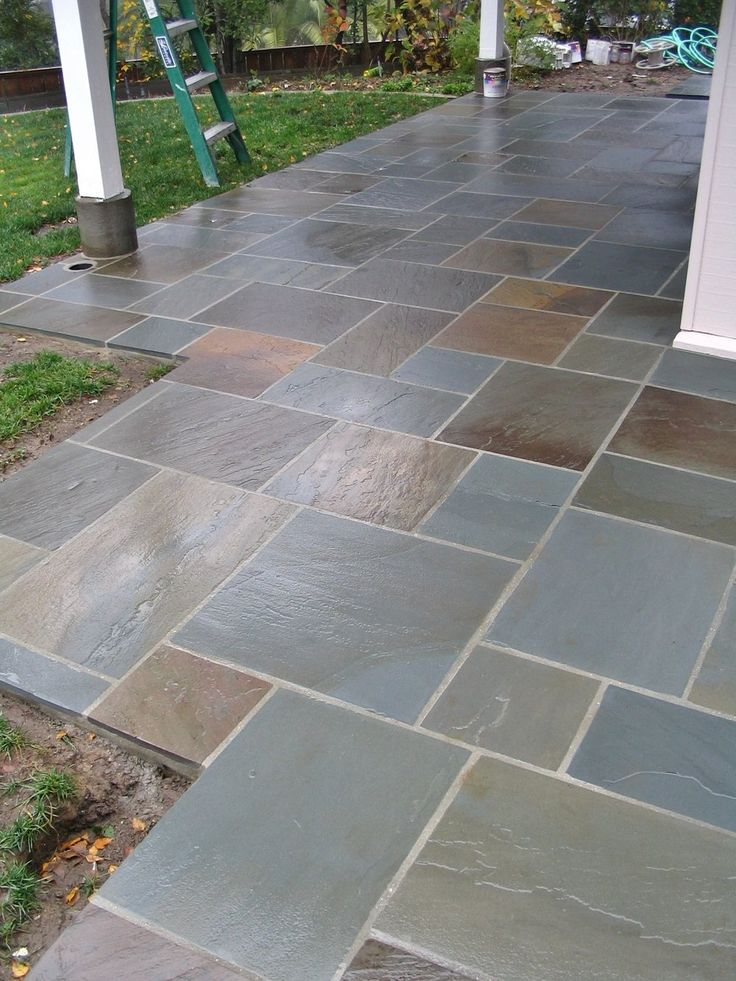
Building a multi-level patio doesn’t need to be expensive if planned with standard, budget-friendly tiles. By using basic concrete pavers or ceramic-look outdoor tiles, homeowners can create stepped areas that separate dining, lounging, and garden zones. Instead of premium stone, cost savings come from choosing widely available tile formats while focusing on layout for impact. Installing different levels requires a compacted base and edging blocks or retaining units, which add definition without significant extra expense. The elevation changes not only add interest but also solve grading challenges in sloped backyards, turning uneven terrain into functional space. Keeping the tile choice consistent across levels ensures a cohesive look, while contrasting joint fillers or border edging can add subtle distinction. Maintenance is straightforward—sweeping debris and occasional resealing prevent wear. For added comfort, rugs or cushions can soften the hard surface while staying within budget. Multi-level patios are especially effective in smaller backyards where zoning creates the illusion of more space. By relying on accessible materials and smart planning, homeowners achieve a layered, practical design that feels high-end without straining finances. Affordable tiles used in a tiered arrangement transform outdoor areas into versatile extensions of the home.
Checkerboard Painted DIY Concrete Tiles
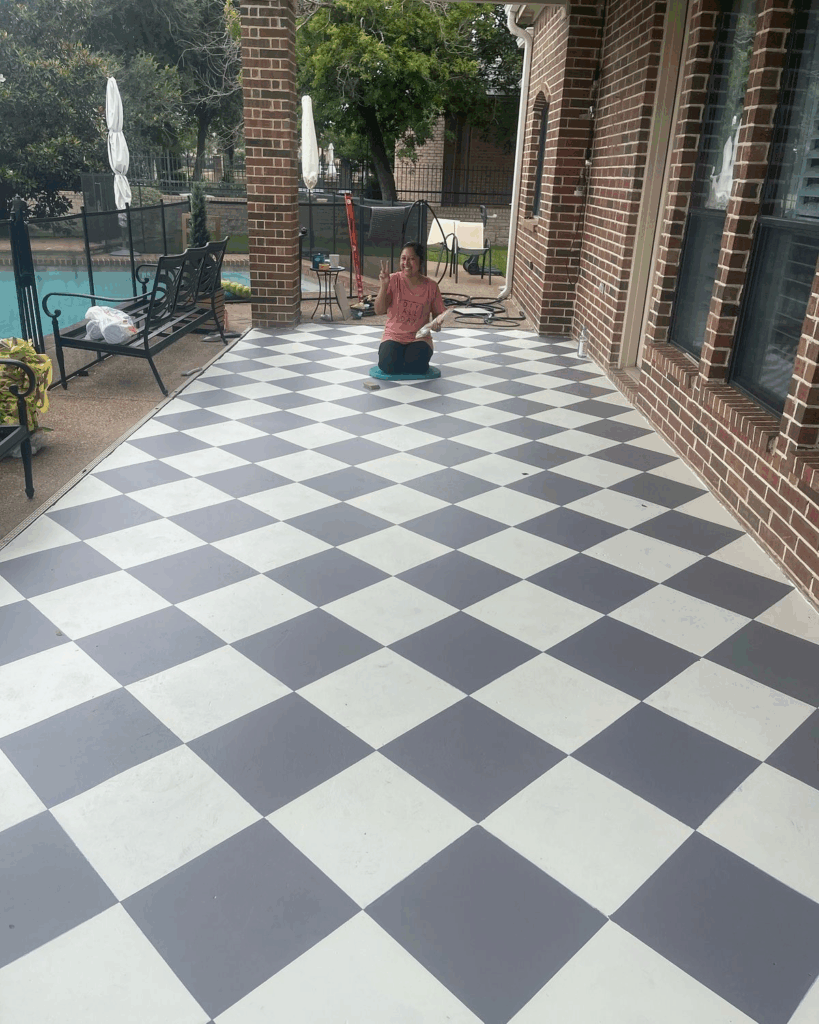
Painted concrete tiles bring a fresh, budget-conscious twist to checkerboard patios. Instead of sourcing expensive stone, homeowners can pour or purchase plain concrete slabs, then use outdoor-grade paints or stains to create alternating patterns. A black-and-white scheme offers timeless elegance, while earthy tones or soft neutrals can tie the patio to garden surroundings. This method drastically reduces costs, as plain concrete is among the most affordable paving materials available. Installation remains simple—slabs are laid over a compacted gravel and sand base before being painted with durable sealants to withstand weather. Beyond affordability, the checkerboard pattern adds bold geometry, making small spaces appear more dynamic. For creative homeowners, stencils or custom colors allow endless customization, ensuring no two patios look alike. Maintenance requires resealing or repainting every few years to maintain vibrancy, but the initial investment is minimal compared to pre-colored pavers. This option works well for DIY enthusiasts eager to personalize their outdoor spaces on a tight budget. A checkerboard painted patio demonstrates how creativity and a steady hand can transform basic materials into something stylish, modern, and highly affordable.
Low-Cost Pavers Framing a Garden Nook or Bench Area
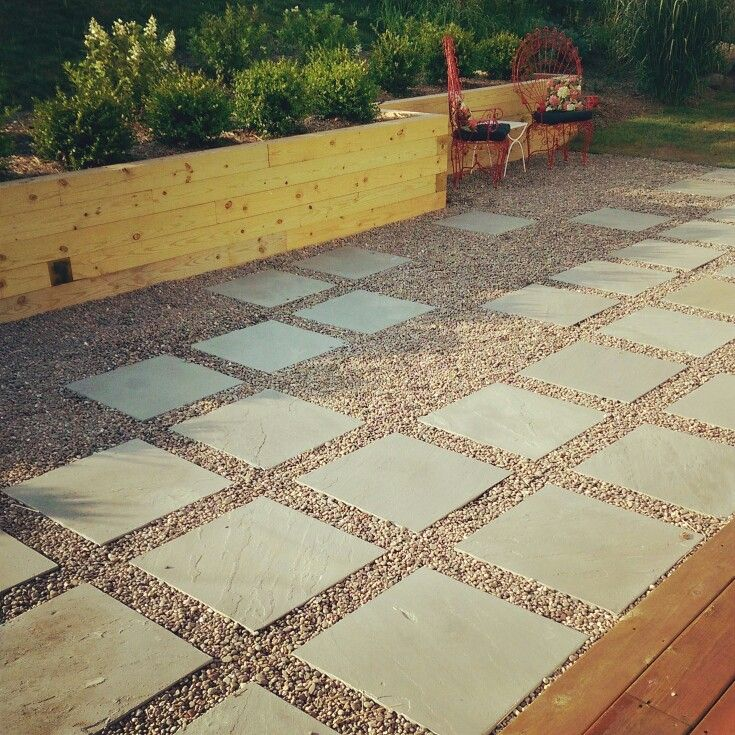
Small, intentional spaces can feel inviting without requiring a full patio build. Using low-cost concrete pavers to frame a garden nook or bench area is an effective way to create charm affordably. The concept focuses on defining just enough surface for seating or a reading corner, rather than paving an entire backyard. Pavers are arranged in a simple rectangle or circle beneath a bench, swing, or pergola, with gravel or mulch surrounding the edges to reduce costs. Because the footprint is compact, fewer materials are needed, making this project achievable on tight budgets. Installation is quick—set pavers on a leveled gravel base, sweep sand into joints, and finish with edging if desired. This framed nook not only adds practicality but also elevates the garden by turning unused corners into destinations. Surrounding the bench with planters, climbing vines, or solar lights enhances atmosphere without adding much expense. Maintenance is minimal: occasional sweeping and joint refreshing keep the surface neat. This design shows that even modest investments can deliver comfort and style. A small paved nook offers relaxation, function, and beauty without the cost of a full-scale patio installation.