
Stylish outdoor spaces don’t have to come with a high price tag—especially when creativity meets smart planning. With affordable materials, repurposed items, and thoughtful layouts, even a modest garden patio can feel polished and inviting. Whether you’re working with gravel, pallets, or pavers, cost-effective upgrades can make a noticeable impact on comfort and curb appeal. This collection of the best budget garden patio ideas highlights practical solutions for maximizing style without overspending. Ideal for homeowners and renters alike, these tips prove that a relaxing, attractive patio is well within reach—no matter the size of your space or the limits of your wallet.
Crushed Stone Patio Base with Recycled Brick Border
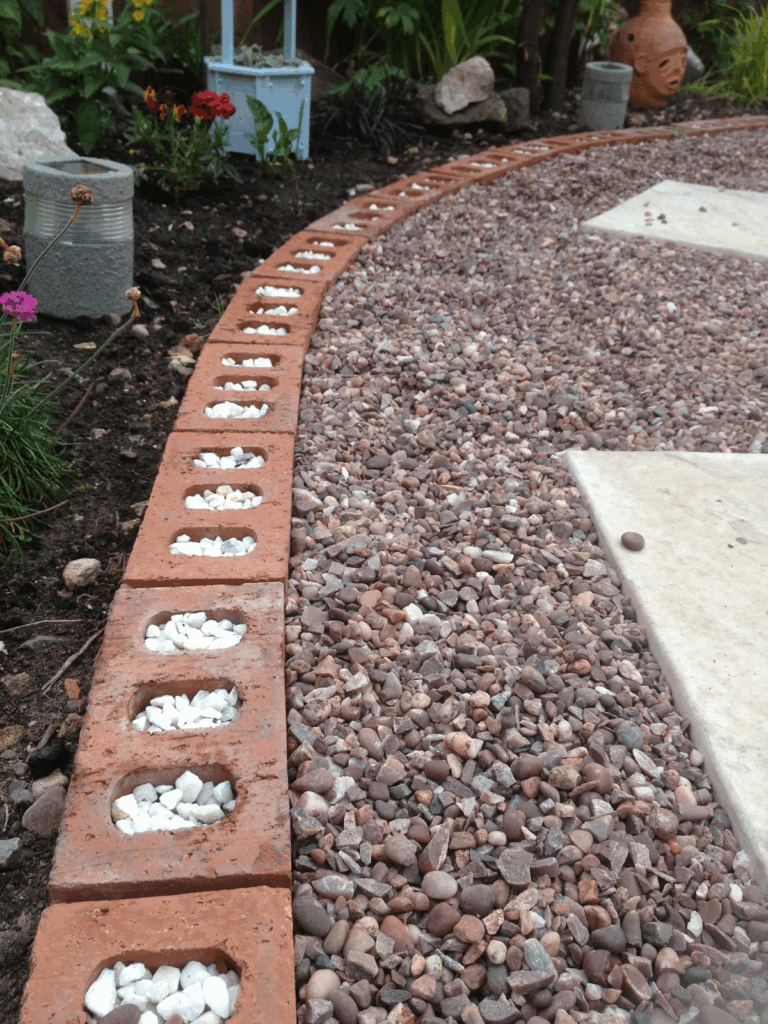
Installing a crushed stone patio base is one of the most cost-effective ways to lay the foundation for a garden seating zone. Crushed stone compacts firmly underfoot, ensuring proper drainage and long-term stability. By pairing it with a border of recycled bricks, the look becomes far more defined and curated without inflating costs. These salvaged bricks—often sourced from demolitions or reclamation yards—add rustic character while neatly containing the loose gravel.
This style suits both small and larger patios, especially where natural, weathered textures are part of the garden’s aesthetic. Consider layering landscape fabric beneath the stone to suppress weeds and improve longevity. The border not only keeps the base intact but can also act as a visual break for adjacent pathways or planting beds.
To finish the look, intersperse large potted plants or vintage garden accessories around the perimeter for added texture. Solar stake lights can line the brick edge to highlight the shape in the evening hours. This simple DIY project blends old-world charm with practical design while allowing homeowners to fully customize the space. It’s an ideal solution for creating structure without pouring concrete or investing in heavy labor.
Painted Concrete Stencil Pattern to Mimic Tiled Look
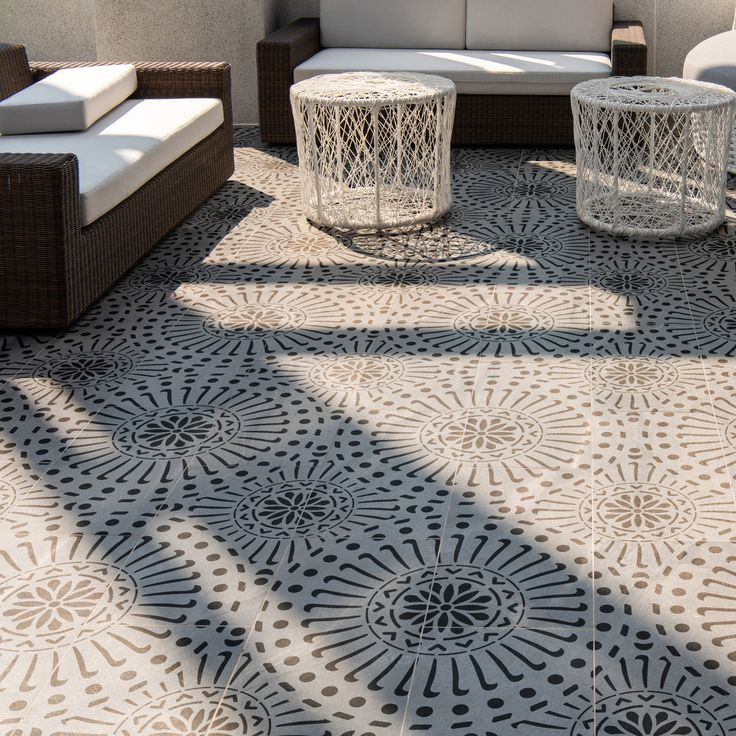
Turning plain concrete into a faux-tiled masterpiece offers surprising visual payoff on a tight budget. With the right stencil and outdoor-grade paint, homeowners can replicate the look of Mediterranean tiles, Moroccan motifs, or vintage cement patterns—no tile-laying required. This trick works especially well on slab patios or walkways that have seen better days but remain structurally sound.
Start by pressure-washing the surface and applying a base coat of concrete paint in a neutral tone. Once dry, lay the stencil and use a dense foam roller to apply the accent color. Multiple stencils can be rotated to maintain pattern consistency across the area. A clear sealant protects the surface from peeling, water damage, and fading due to sun exposure.
This approach allows total creative freedom in selecting colors and designs while avoiding the costs of demolition or tile installation. Pair the stenciled floor with black wrought-iron furniture or rattan loungers to balance old-world pattern with modern style. Use outdoor rugs or planters sparingly so the pattern remains the visual focal point. This DIY trick upgrades the patio’s appearance without structural changes, turning concrete into a feature element rather than an eyesore.
Repurposed Pallet Lounge Bench with Outdoor Cushions
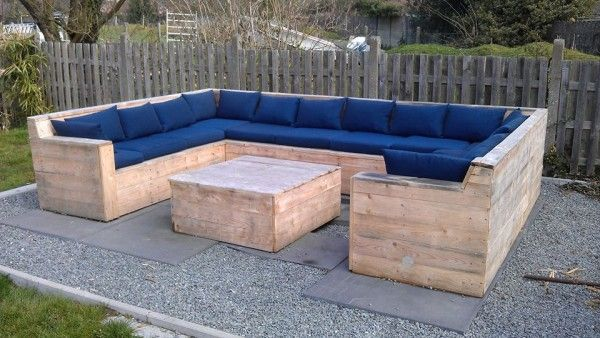
Wood pallets offer a sturdy and affordable base for creating custom outdoor seating. When assembled and sanded properly, they form the perfect foundation for a low-profile lounge bench that suits both compact patios and broader garden corners. Layering the top with foam cushions wrapped in weather-resistant fabric adds comfort and charm without overspending.
Begin by selecting pallets in good condition—look for HT-stamped (heat-treated) wood for safety. Two stacked pallets make a solid seat, while an angled backrest can be secured with screws or brackets. Painting the entire structure in a bold color or neutral stain protects the wood and aligns it with the garden’s palette.
This setup shines in relaxed zones meant for lounging, reading, or casual conversation. For extra function, consider attaching caster wheels for mobility or adding a hidden storage drawer underneath the seat. Accent pillows, string lights overhead, and a surrounding mix of potted greenery complete the look. This project thrives on creativity and practicality, making it ideal for renters, small yards, or anyone looking to revamp their patio using upcycled materials. The end result is both functional and uniquely tailored to your outdoor lifestyle.
Gravel Circle Patio with DIY Fire Pit Centerpiece

Circular gravel patios centered around a DIY fire pit offer both visual symmetry and a cozy gathering space. Laying pea gravel or crushed granite creates a natural, permeable surface that’s easy to maintain and budget-friendly. Using a garden hose to outline the circle, mark the shape, then dig a few inches down before layering weed barrier fabric and gravel.
A simple fire pit can be constructed from stacked retaining wall blocks or fire-rated pavers—no mortar needed. Be sure to place it on a level, fire-safe base like compacted sand or gravel. This setup suits casual evenings, outdoor dinners, or chilly mornings with a hot drink in hand.
To enhance comfort, place Adirondack-style chairs or metal benches in a ring formation around the pit. For ambiance, incorporate solar lanterns or stake lights around the perimeter. You can also surround the gravel with low-growing herbs like thyme or creeping sedum for a soft visual edge.
This design turns an underused lawn section into a functional outdoor room, without requiring concrete or carpentry. It invites gathering, storytelling, and relaxation—while staying within a tight budget and blending naturally with garden landscapes.
String Lights Hung on DIY Pole Buckets for Instant Ambience
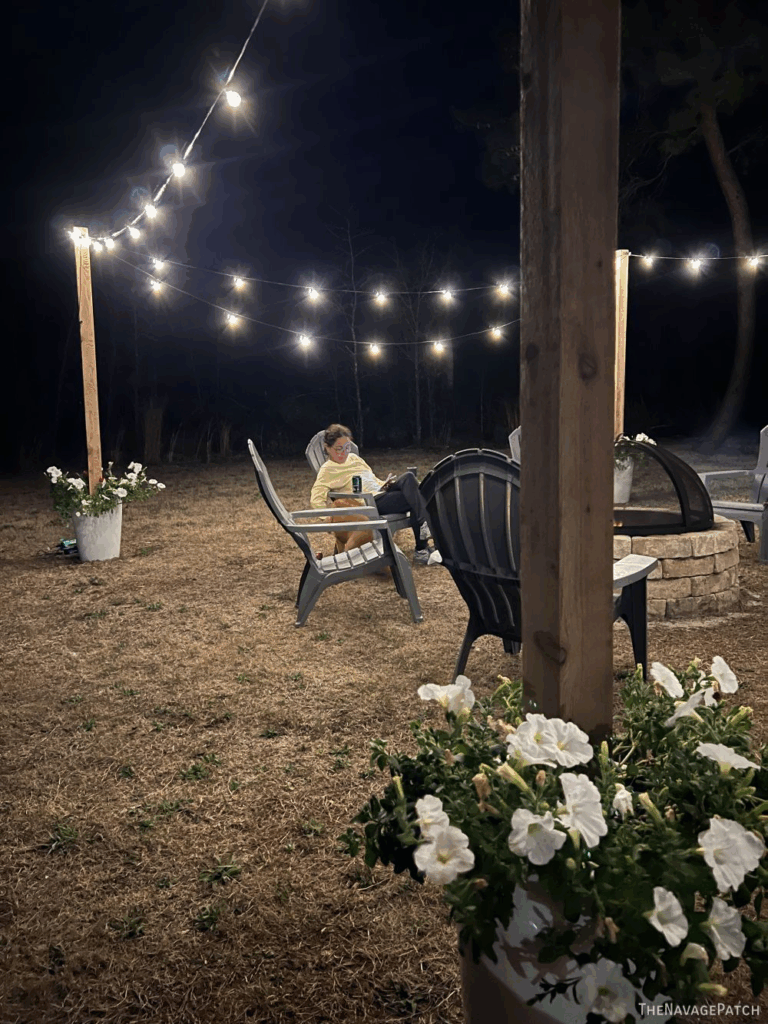
Soft outdoor lighting can dramatically shift a patio’s mood—and it doesn’t require permanent fixtures or professional installation. By anchoring tall wooden poles in concrete-filled buckets, you can create freestanding supports for string lights that define the patio’s perimeter and add warmth after dark. These DIY pole buckets are especially handy for renters or temporary setups, since they don’t damage existing surfaces.
Use inexpensive galvanized buckets or large planters filled with quick-set concrete. Insert a treated 2×2 or 4×4 wood post and use a level to keep it upright until the mix sets. Once dry, wrap the base in jute rope or paint it to match your decor. Space buckets evenly at corners or edges of the patio, then string café lights or fairy lights overhead in a zigzag or border pattern.
This method works for gravel patios, concrete slabs, and even garden corners with no existing structures. It transforms outdoor space into a cozy, inviting nook suitable for entertaining or winding down solo. For extra flair, add hanging lanterns or small plant hooks on the poles themselves. It’s a fast, flexible solution that makes a major impact on atmosphere without straining your wallet.
Container Wall Garden Using Painted Tin Cans
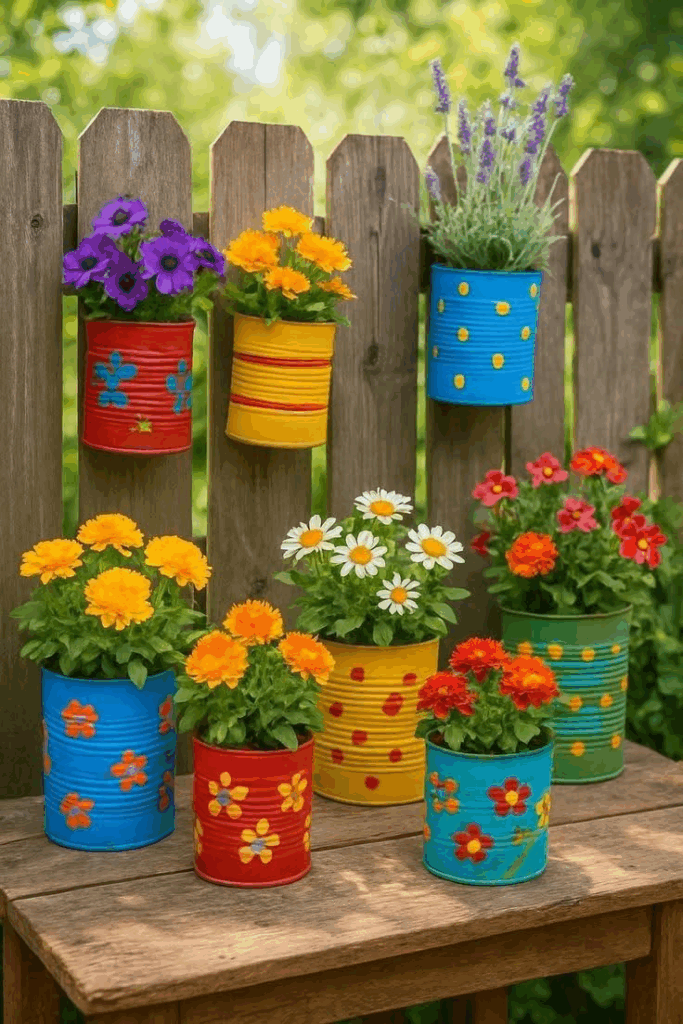
Repurposing tin cans into colorful planters delivers vertical garden appeal while maximizing budget and space. Whether sourced from kitchen recyclables or bulk food supplies, these containers can be transformed into charming mini planters for herbs, succulents, or small flowers. A coat of spray paint or acrylic craft paint gives them a cohesive look, while drill holes at the base ensure proper drainage.
Mounting them to a wood pallet, lattice panel, or even directly onto a fence turns a blank wall into a living art piece. Use hose clamps, zip ties, or screws to fasten each can securely. Arrange them in rows, staggered grids, or playful shapes to suit your garden aesthetic.
This vertical setup adds texture and greenery without taking up floor space—ideal for tight patios or balconies. Choose sun-loving plants for bright walls or opt for trailing greenery to soften hard edges. A backdrop of reclaimed wood enhances the rustic charm, while bold colors make the display pop in modern settings.
It’s an approachable DIY project with high visual reward, allowing for creative expression and sustainability. Better yet, it keeps materials out of landfills while bringing vibrancy and freshness to even the smallest outdoor areas.
Foldable Bistro Set on Checkerboard Pavers & Mulch Combo
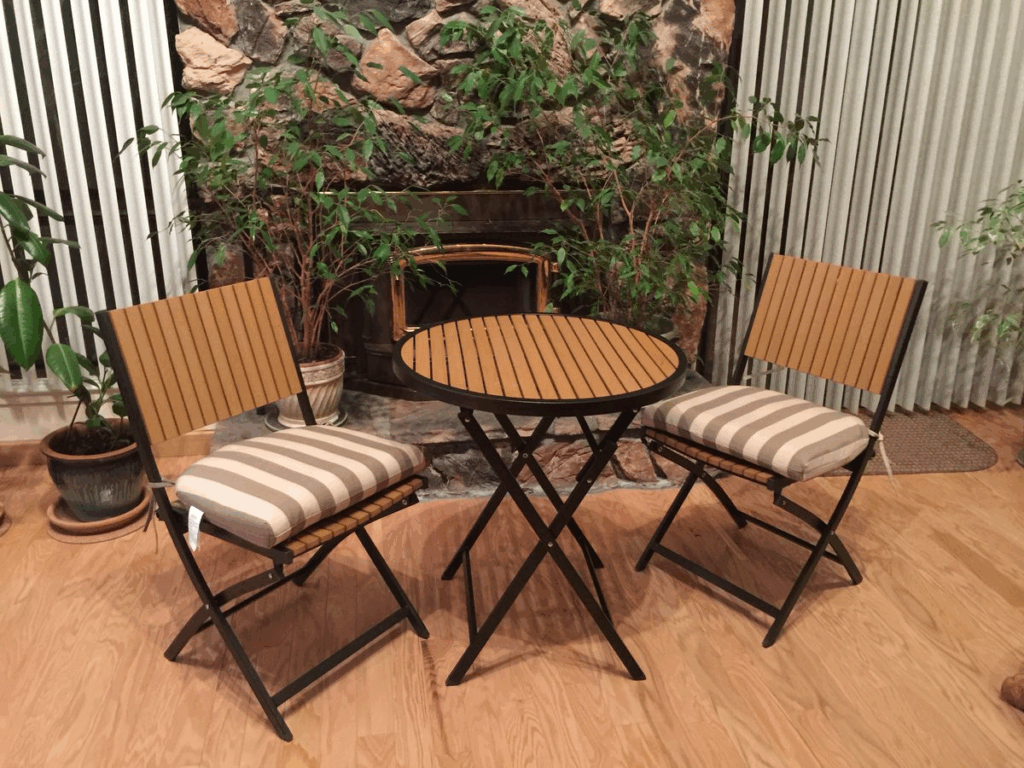
Layering a checkerboard pattern of square pavers and dark mulch adds instant structure and style to a small patio zone. This alternating layout creates visual rhythm and defines the space without pouring a full slab. The method suits tight budgets and modest footprints, especially when paired with a compact foldable bistro set for morning coffee or casual meals.
Start by measuring and marking a grid, then dig out shallow squares where each paver will sit. Lay landscape fabric to suppress weeds before filling alternate squares with mulch. Choose pale or light-toned pavers to contrast with rich brown or black mulch, giving the design a striking yet grounded appearance.
A folding bistro table and chairs can be tucked away when not in use, making the space feel bigger and more flexible. Choose weather-resistant metal or acacia wood for durability. Consider edging the area with small boxwoods or gravel to keep mulch tidy.
This combo suits renters, small yards, or side-yard patios that need definition without permanent changes. The contrast between materials makes the area feel curated, while the mobility of the furniture keeps it user-friendly and adaptable throughout the year.
Budget-Friendly Sail Shade Hung from Fence Hooks
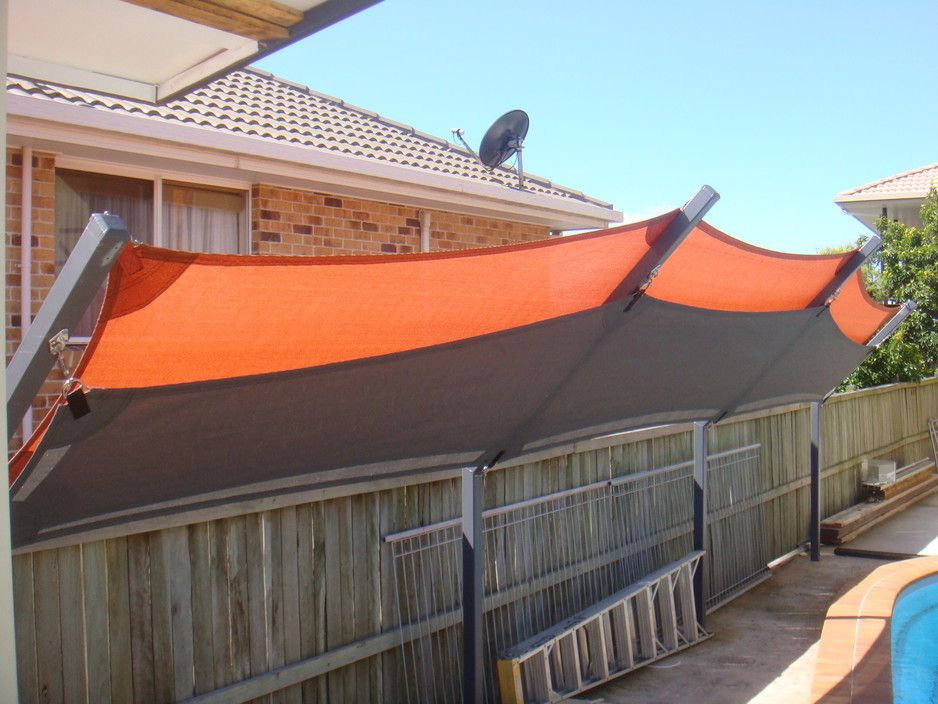
Patio sun coverage doesn’t have to rely on costly pergolas or custom umbrellas. A triangular sail shade strung between fence hooks and house corners offers a sleek solution that’s both affordable and renter-friendly. These breathable fabric sails block UV rays while allowing air circulation, making them ideal for hot afternoons or dining areas that get too much sun.
Choose a durable shade cloth with reinforced corners and grommets. Stainless steel turnbuckles or carabiners make tensioning easy, and heavy-duty screw hooks can be mounted directly into wood posts or masonry using proper anchors. Stretch the sail tight for a clean look, ensuring it tilts slightly to allow water runoff during rain.
This setup is perfect over gravel patios, paver sections, or even above picnic zones in the backyard. Pair the shade with outdoor rugs and a low dining table to create a cozy retreat without construction. For a more colorful aesthetic, opt for bright sail hues or patterned fabric to add a playful twist.
It’s a smart way to gain function, reduce heat, and give your patio a finished feel—especially for homes without trees or covered porches. Setup takes less than an hour and can be taken down seasonally or reoriented as needed.
Upcycled Wood Crate Coffee Table with Caster Wheels
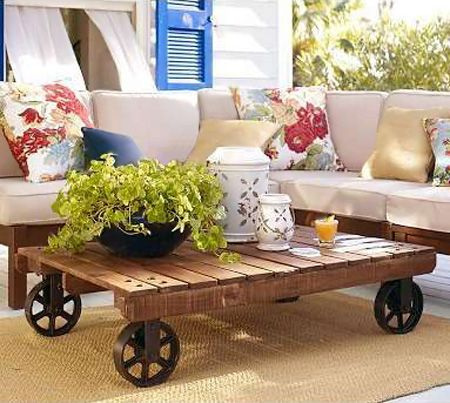
Creating a movable coffee table out of old wooden crates delivers both rustic charm and multi-use function to any patio setup. With a little sanding, staining, and hardware, mismatched fruit or wine crates become a conversation piece that doubles as storage. When mounted on caster wheels, the table can easily be shifted to fit lounging, dining, or solo reading needs.
Start by arranging four crates in a square with the open sides facing outward. This configuration forms a hollow center perfect for plants, magazines, or outdoor throws. Screw the crates together securely, then attach a plywood base and caster wheels underneath. Finish the entire piece with weatherproof stain or exterior paint to withstand the elements.
The interior slots are great for storing citronella candles, garden tools, or drink trays. Top it with a piece of glass for a polished finish or leave the wood raw for a farmhouse feel. This piece fits seamlessly into patios with pallet seating, gravel bases, or string-lit zones.
Repurposing wood crates keeps waste out of landfills and saves money on outdoor furnishings. It’s a hands-on project that invites creativity while providing lasting utility for budget-conscious patio design.
Mixed-Material Patio: Brick Corners, Pebble Infill
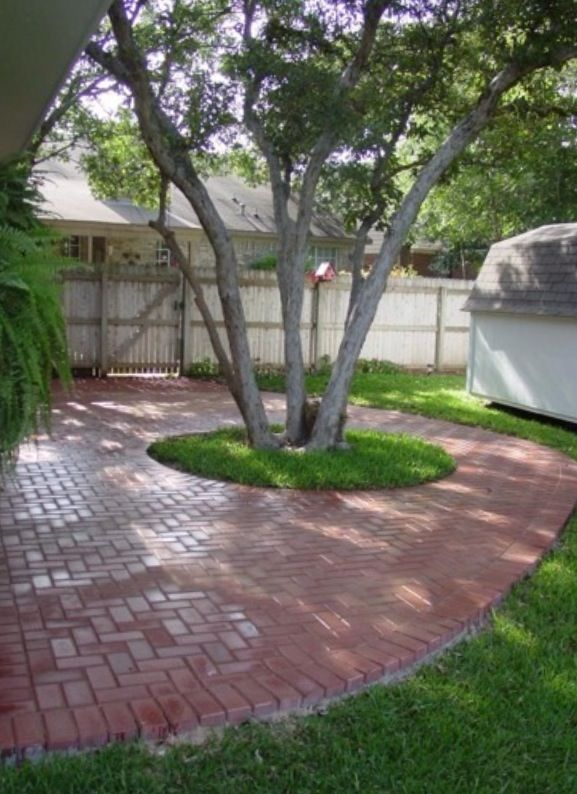
Combining bricks and pebbles brings rich texture and geometric precision to garden patios without high material costs. Framing corners or square outlines with red or gray bricks creates visual order, while infilling the open areas with small pebbles offers flexibility and drainage.
Begin by sketching your layout and measuring the area. Bricks can be dry-laid on compacted soil or mortar-set for permanence. The key is ensuring the corners and lines are square and even, forming crisp boundaries that prevent pebbles from spilling into adjoining lawn or garden beds.
Fill the center zones with decorative gravel, river pebbles, or crushed stone. Rake smooth for a level surface and compact with a hand tamper for stability. The contrast in texture and color adds interest without needing expensive flagstones or poured concrete.
This patio style is particularly suited for entertaining nooks, meditation corners, or spots for small dining sets. Use potted plants or a sculptural bench to highlight the mixed materials and anchor the space. Brick edges act as visual guides and functional dividers while the pebbles offer easy upkeep and water permeability.
It’s a durable, low-maintenance solution that turns any bare patch into a well-defined, welcoming patio space.
Tiered Potted Plant Stand Made from Old Ladder
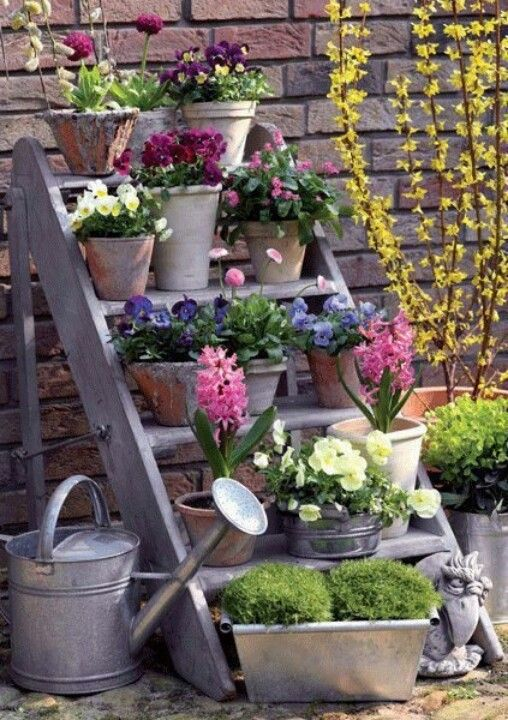
An unused wooden ladder can be cleverly repurposed into a tiered plant stand, ideal for showcasing container gardens on patios with limited ground space. Leaned against a wall or mounted securely, it becomes a rustic vertical display that adds height and greenery without overwhelming a small area.
Choose a ladder with wide rungs and solid frame construction. Sand the surface and apply weather-resistant paint or stain to protect against moisture. Use each rung as a support point for terracotta pots, metal planters, or recycled containers filled with herbs, flowers, or cascading vines.
To stabilize pots, add narrow wooden planks across the steps or use metal pot holders screwed into the rungs. This staggered display works especially well against fences or house siding, where flat space meets vertical lines. It also helps create layers in a container garden, bringing dimension without clutter.
Lighting elements like clip-on lanterns or string lights can add nighttime charm. Consider trailing plants on the top tiers and upright ones on the lower rungs to draw the eye upward. This DIY project blends function with style and makes smart use of salvaged materials to deliver high visual payoff on a tight budget.
DIY Concrete Stepping Stone Path Leading to Patio Zone
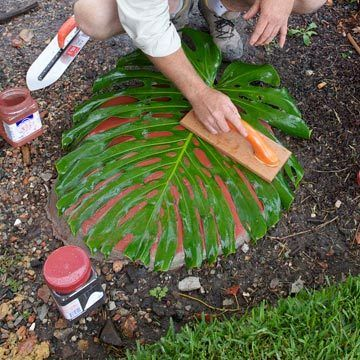
Laying a custom path of concrete stepping stones offers both function and creative flair, guiding guests to your patio while blending into natural surroundings. Homemade stepping stones using quick-set concrete molds let you control size, shape, and design—ideal for irregular garden layouts or budget-focused updates.
Use baking pans, pizza boxes, or commercial molds to shape the stones. Add texture by pressing leaves, mosaic tiles, or pebble inlays into the wet concrete. Once cured, the stones should be sealed with a weatherproof finish to ensure durability across seasons.
Space the stones with comfortable walking strides over grass, mulch, or gravel. Level each base area with sand or soil for secure footing. This approach works well in gardens with winding paths or patios set away from the main entrance. It also helps protect grass from foot traffic wear.
For a cohesive look, align the stepping stone color with surrounding patio materials. Use solar-powered path lights or border the route with low groundcovers like creeping thyme for added softness and visual rhythm. This project is beginner-friendly and offers a practical way to connect different yard zones while adding handmade charm.